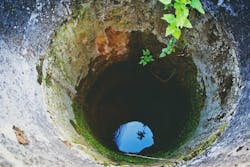
How to Disinfect a Well in 10 Easy Steps
It is important to sanitize a well twice a year whether it is a new well or an existing well. If the well has been disrupted for service or repair, it must be sanitized. The well storage tank and fixtures should be rinsed with a strong sanitizing solution to kill all harmful pollutants.
Better Water Industries, Inc. puts out a brochure describing the steps to properly sanitize a well.
The company's Sanitizer Pellets and Granules can be used for well, storage tank or cistern sanitation. the amount of tablets and granules used will depend on the amount of water to be sanitized in the system. A 50 ppm chlorine concentration is ideal for sanitizing a well. To produce a 50 ppm chlorine concentration, use one oz. sanitizer pellets or granules for each 100 gal of water in the system. (1 oz. granules/100 gal = 35 pellets/100 gal) If the water has a high iron or sulfur content, more chlorine may be needed to achieve a 50 ppm chlorine residual.
How to Disinfect a Well: A 10 Step Guide
- Bypass the water softener, other filters or purification equipment.
- Remove the cap or seal from the casing and, if possible, measure the depth of the water in the well (and refer to the Table in step 10, on page 27) to determine how much sanitizer should be used. In some instances, removing the seal to measure the water can be a difficult task. It may be easier to estimate well and water depth from well logs or other records. As a general rule, it is better to use too much sanitizer than too little. If too much sanitizer is used, it will simply take longer for the taste and odor to leave the system.
- Use a pipe to get by any restriction in the well, a 10 ft length of 3/4-in. PVC is usually ideal. (If it is not possible to remove the well cap, remove vent or sanitation access plug.)
- Drop one tablet into the well and listen to hear if it hits the water. If the tablet hits the water, drop one-half of the determined amount of sanitizer tablets needed into the well. These will sink to the bottom and sanitize the lower portion of the well.
- Mix half of the determined amount of granules in a clean, plastic five gal container of water. Pour the solution down the well to sanitize the upper portion of the well.
- It is necessary to recirculate the water in the well to mix the sanitizer thoroughly throughout the entire water system. Connect a hose to an outside silcock that is located after the pressure tank and run water back down the well (this also rinses the upper portion of the well). After about 15 minutes of recirculating the water, a strong chlorine odor should be present; if not, repeat steps 4 and 5.
- Allow the sanitized water to stand in the system for at least six hours-preferably over-night. Open an outside faucet and flush the system until the water runs chlorine free (until you don't smell any chlorine). Repeat flush operation on each faucet in the system.1
- Return all equipment to service position.
- After two to three weeks test the water. If bacteria, iron bacteria, sulfur or other problems recur, further treatment is required. (See Step 10 below.)
- Determining the Amount of Sanitizer Needed:
| Well diameter | Gal of water/100 ft | Oz. of granules to achieve 50 ppm | Number of pellets to achieve 50 ppm |
| 2 in. | 20 | 0.4 | 12 |
| 3 in. | 40 | 0.8 | 24 |
| 4 in. | 70 | 1.25 | 44 |
| 5 in. | 110 | 2.0 | 68 |
| 6 in. | 150 | 2.7 | 94 |
| 8 in. | 260 | 4.6 | 162 |
| 10 in. | 410 | 7.3 | 256 |
| 12 in. | 590 | 10.5 | 368 |
| 24 in. | 2350 | 42.0 | 1468 |
| 36 in. | 5290 | 94.0 | 3306 |
If you have question about sanitizing wells or the pellets and granules described here, Better Water Industries may be reached at 507.247.5929.
Note: Chlorine may make the water run colored, and iron deposits, slime and organic material may break loose and plug pump screens; do not continue to run pump if water does not flow. Also, the high level of chlorine required to sanitize a water system is corrosive to most metals and the chlorine solution must not remain in the water system for more than 36 hours before completely flushing from the system.
This article was originally published on Dec. 28, 2000. It has been revised for clarity.
